How to Secure a RIBBY Connector to a 32 mm Tube — Choosing the Right Fixing Method
When building frames, racks, railings or trolleys with the RIBBY 32 mm pipe bracket system, most of the strength comes from the connection between the bracket and the tube. The brackets are designed to slide snugly into standard 32 mm tubing — but the real strength comes from how you lock that connection in place.
Different projects need different fixing methods. A workshop shelf, a mobile trolley and a permanent outdoor structure cannot all be assembled the same way. Therefore, choosing the correct securing method is essential for safety, durability and usability.
This guide explains the available options and when to use each one.
How the RIBBY Connection Works
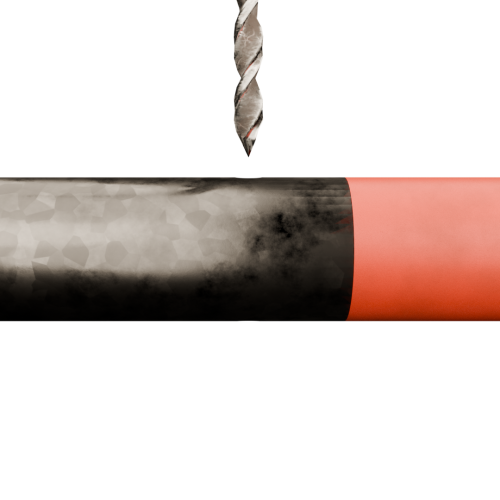
RIBBY connectors are manufactured from 32 mm × 2 mm material with crimped ends. This creates a tight push-fit inside a 32 mm tube.
You can use tubing with:
1.6 mm wall thickness
2.0 mm wall thickness
Because steel tubing has manufacturing tolerances, the fit is intentionally snug — not loose.
Important note about 2 mm tubing
Some tubes have an internal weld seam. Occasionally this seam must be lightly filed for easier insertion of the connector.
The tight fit already creates a strong joint, but it can still:
Rotate
Pull out
Loosen over time
Therefore it must be secured properly.
The 3 Main Ways to Secure a RIBBY Connection
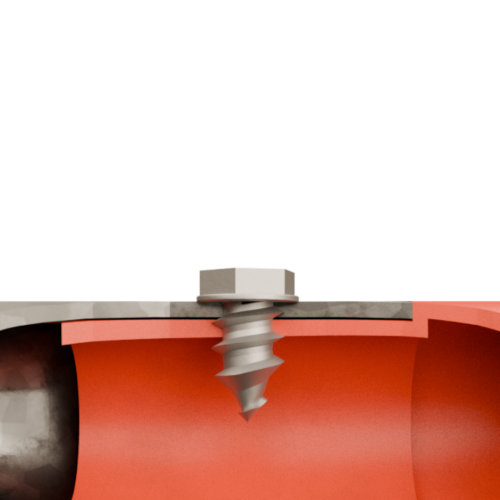
1. Self-Tapping Screw (Removable Fixing)
Best for: adjustable or transportable structures
You drill a hole through the tube and bracket and fasten with a screw.
Advantages
Can be dismantled easily
Perfect for modular builds
Quick installation
Ideal for DIY users
Limitations
Not suited for heavy vibration
Slight movement possible under high load
Typical uses
Display racks
Workstations
Light shelving
Equipment frames that must move
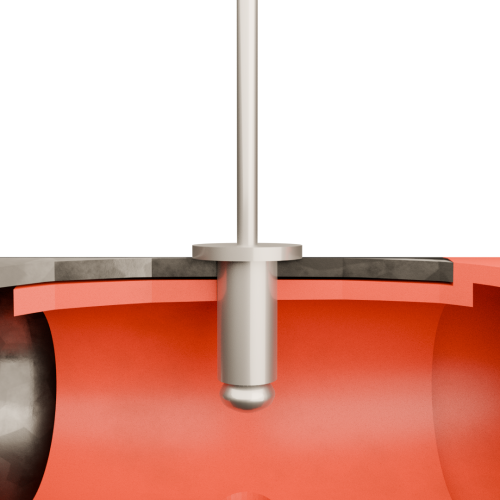
2. Rivet (Semi-Permanent Fixing)
Best for: medium-duty permanent structures
A rivet locks the bracket more securely than a screw and cannot loosen easily.
Advantages
Cleaner appearance
Faster than welding
More secure than screws
Good for repetitive production builds
Limitations
Harder to remove
Can fatigue under heavy vibration
Typical uses
Storage racks
Light industrial frames
Farm structures
General workshop builds
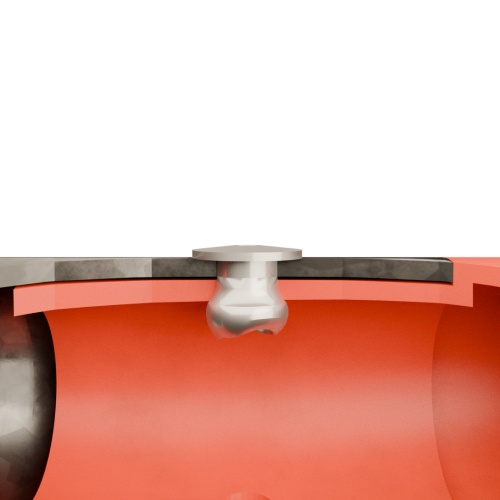
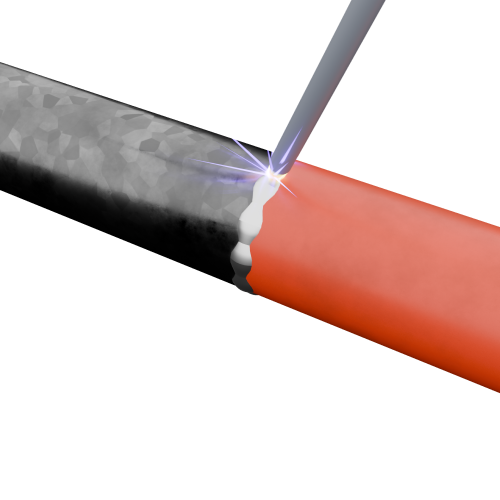
3. Welding (Permanent Fixing)
Best for: high-stress or safety-critical structures
You can apply anything from a small tack weld to a full weld around the joint.
Advantages
Strongest possible connection
Prevents movement completely
Ideal for vibration and heavy loads
Limitations
Not removable
Requires welding equipment
Slower assembly
Typical uses
Trolleys carrying heavy loads
Outdoor installations
Structural frames
Commercial applications
Why Different Fixing Methods Matter
Every structure experiences different forces:
Structure Type
Movement
Recommended Fix
Portable display
Frequent dismantling
Screw
Workshop rack
Occasional load
Rivet
Heavy trolley
Constant vibration
Weld
Outdoor frame
Wind & weather
Weld or Rivet
Using only one fixing method for all projects either:
makes the structure unsafe or
removes flexibility
The RIBBY system is designed to give builders freedom to choose strength or flexibility where needed.
Best Practice Tips
✔ Mix methods in one project if needed ✔ Weld only high-stress joints ✔ Use screws where repetitive connections ✔ Rivet permanent connections ✔ Always secure load-bearing joints
Conclusion
The push-fit RIBBY connector already forms a strong joint — but the securing method determines how your structure behaves over time.
Screws give flexibility
Rivets give reliability
Welding gives maximum strength
Choosing the correct option ensures your build is not only easy to assemble, but also safe and durable in real South African working conditions.
In short: The bracket creates the frame — the fixing method defines the performance.