How to Build with the RIBBY Pipe Bracket System (Step-by-Step Guide)
Building frames, trolleys, racks, workstations or railings normally requires welding skills, expensive tools, and a lot of measuring mistakes. However, the RIBBY pipe bracket system changes that completely.
Instead of fabricating every joint yourself, RIBBY brackets handle the connections, corners, bends and supports. As a result, you only cut pipe to length and assemble — fast, accurate and repeatable.
Whether you are a DIY enthusiast, workshop owner, farmer, or contractor in South Africa, this guide explains exactly how to plan and build your project correctly.
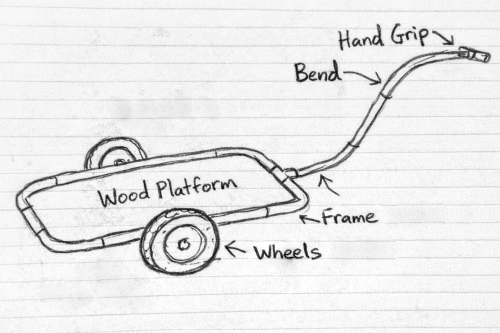
Step 1 — Start With a Sketch
First, never begin cutting pipe immediately.
Instead, draw a simple sketch of what you want to build:
Overall size (length, width, height)
Where loads will be carried
Where support legs will stand
Where shelves, tops, or panels will be fitted
You do NOT need an engineering drawing. Even a hand sketch works perfectly.
Why this matters:
RIBBY brackets solve the joints — but the layout must come from you.
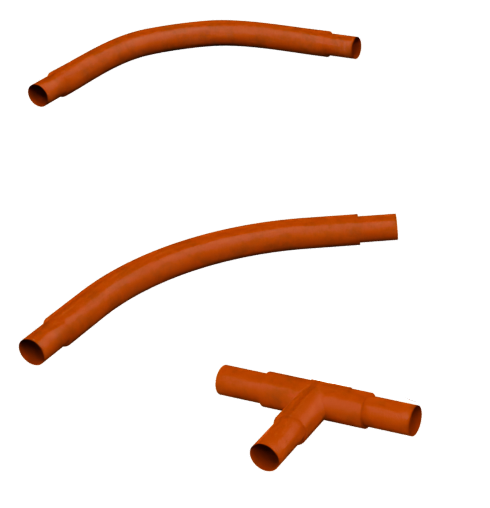
Step 2 — Choose the Correct Brackets
Next, look at the different RIBBY brackets and place them into your drawing.
Each bracket represents a function:
Corners
Tees
Bends
End supports
Stay clamps (for bracing)
Think of the brackets as the connection points of your project.
Once the brackets are positioned correctly, the structure will naturally become strong and square.
Step 3 — Plan Your Support Spacing (Very Important)
One of the biggest mistakes people make is placing supports too far apart.
As a rule of thumb, do not exceed 2.5 m to 3 m without support, depending on the load.
Use the following load guidance between two supports:
Distance Between Supports | Recommended Load Capacity |
|---|---|
1.5 m | ± 50 kg |
2.0 m | ± 35 kg |
2.5 m | ± 30 kg |
3.0 m | ± 20 kg |
The heavier the load, the closer the supports must be.
For example:
A tool rack or shelf carrying batteries, motors or steel must have closer legs than a light display rack.
Step 4 — Add Cross Bracing
After supports are positioned, the next step is stability.
Large structures can collapse sideways even if they are strong vertically. Therefore, you must add cross bracing.
You can create cross braces using:
Stay clamps
Flat bar
Steel cable
Wire
This prevents:
Swaying
Twisting
Racking movement
Important:
If it can wobble, it will eventually fail — bracing stops that.
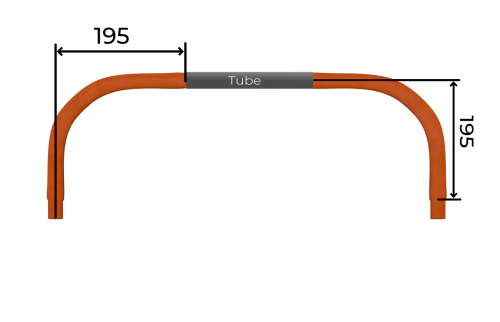
Step 5 — Calculate Pipe Lengths
Now measure the distance between brackets, not overall outside sizes.
This is where many builders make mistakes.
Allow Tolerance
Always allow at least:
+ 10 mm (1 cm tolerance) for the brackets
and
+ sum tolerance for the surroundings
Why?
Because:
Floors are uneven
Steel is never perfectly straight
Walls are not square

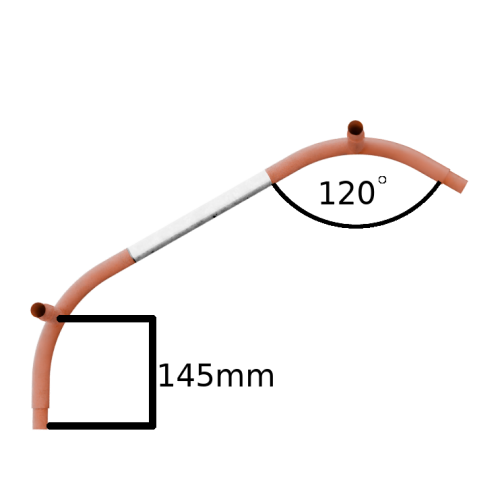
Step 6 — Cut Pipes the Smart Way
If the measurement is critical, do NOT cut everything beforehand.
Instead:
Assemble the brackets first
Measure on site
Cut the pipe
Fit immediately
This ensures a perfect fit and prevents wasted material.
Things to Keep in Mind When Building with RIBBY
✔ Plan before cutting
✔ Supports determine strength
✔ Bracing determines stability
✔ Measure between brackets
✔ Allow tolerance
✔ Cut on site if accuracy matters
Why Builders Prefer the RIBBY System
No welding required
Faster installation
Easy to modify later
Expandable designs
Perfect for DIY and commercial use
Ideal for South African workshops and farms
Once you build your first structure, you will notice something important:
You stop designing around tools…
and start designing around ideas.
Conclusion
The RIBBY system simplifies fabrication by separating structure from connection.
You focus on layout — the brackets handle the engineering.
By following the correct steps — sketching, spacing supports, adding bracing, and cutting accurately — you can build strong, professional-looking structures without specialised skills.
In other words, you build smarter, faster, and with confidence.